Showing posts with label Food. Show all posts

Friday, July 19, 2013

Adventures in Canning

As I mentioned in my post about raspberry picking, this is the year that I decided to try my hand at canning.  I’ve made freezer jam in the past, and it is so easy and delicious, but I have limited freezer space.  And it wasn’t even a question about whether or not I’d make raspberry jam, our family loves enjoying it over the winter!

P1040204

I borrowed my mom’s canning supplies.  I love the vintage canning book, which cost a whopping 50 cents!

 P1040205

No fancy recipe for me, I simply followed the MCP Premium Fruit Pectin’s directions.

Step 1:  Bring a large pot of water to a boil. This takes a LONG time. My biggest discovery about canning is that it is all about timing.  Thankfully, if you follow the directions step by step, the timing all works out.

Step 2: Pour boiling water over the lids and let them sit in the water until ready to use.

 P1040206

Step 3: Wash jars in soapy water and fill with warm water. I added the part about leaving them filled with warm water. I decided to do this because I had read on some blogs that it was good to have the jars warm when you put the piping hot jam into them.

P1040207

Step 4: Place berries in a bowl and smash them. I used this wooden masher from my mom, but a potato masher, or spoon would work too. Mash berries well, but leave small bits of berries in tact for a good consistency. Once mashed, measure exactly 6 cups of berries and place in a saucepan.

P1040208

P1040210

Step 5: Measure 8 1/2 cups of sugar in a bowl.

P1040211

Step 6: Add pectin and 1 tablespoon butter to berries in saucepan and bring to a full boil. Stir continuously. The butter stops the berries from becoming too frothy.

P1040212

Step 7: Once berries have come to a full boil, boil for 4 minutes exactly.  Stir the whole time.

P1040215

Step 8: Pour jam into jars. Fill jars until about 1/8 inches from the top. Wipe rims with a damp cloth and put lids on. My counter looked a bit like a scene from a horror movie after this step!

P1040216

Step 9: Seal jars in a water bath. Place jars on a wire rack and lower into the boiling water. Make sure jars are covered with 1-2 inches of water. Place lid on pot, return water to a full boil and boil for 10 minutes.

P1040217

Step 10: Remove jars from water bath and cool on a towel. Jam will need about 24 hours to fully set. As jars cool, you’ll hear the lovely pop of the tops as they seal. Test seal by pressing down the center of the jar.  If it doesn’t move, you’re sealed!

P1040218

And there you have it, fresh jam all year long!

P1040234

Tuesday, March 26, 2013

Dyeing Easter Eggs

P1030500

They boys dyed Easter eggs this afternoon.  Aren’t the bright colors great?  I used neon food coloring. Making your own Easter egg dye couldn’t be easier—no need to purchase those kits!  Just combine hot water, vinegar, and food coloring and you are ready to go!

Easter Egg Dye:

1 teaspoon vinegar

10-20 drops food coloring (depending on intensity you desire)

1/2 cup hot water

P1030498P1030499P1030497

Now if you are feeling like an overachiever, you could create your own dyes using all natural ingredients.  Here are some sites with details:

Better Homes & Gardens

Natural Egg Dyeing

source


2122_oniondyedeggs.jpg

Martha Stewart

Perhaps next year I’ll give au natural a try. Looks intriguing!

Cheers,

Melissa

Saturday, February 9, 2013

Shortbread and Hair Ties

The Craft Club has struck again. This time, tasty shortbread and super cute and trendy hair ties.

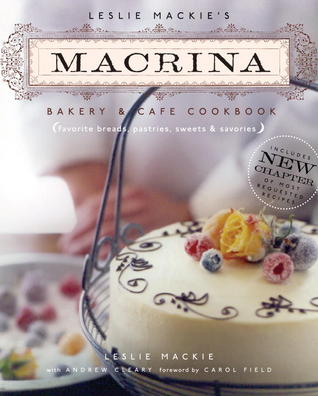
The Sour Cherry Shortbread recipe came from the Macrina Bakery cookbook. I can take zero credit for this endeavor. Our club host made the dough ahead of time and another clubber cut, baked, and packaged the cookies. I did nothing. Except taste them, of course. And they were absolutely delicious.

Leslie Mackie's Macrina Bakery & Cafe Cookbook: Favorite Breads, Pastries, Sweets & Savories

P1030304P1030305

We packaged them up with cellophane and put a sweet little label on them.

P1030307

P1030310P1030312

Won’t these make a tasty treat to give to our sweeties on Valentine’s Day?


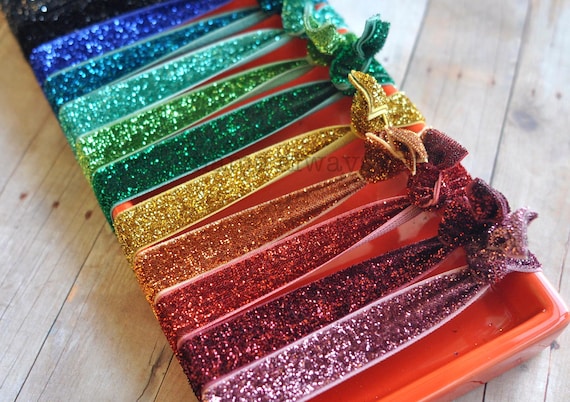
Now, the reason that I didn’t help with the cookies is that I was busy making hair ties. Have you seen these around?  They’re everywhere.

Multitude Hair Ties   Emi-Jay 'Silver Glitter' Hair Ties (3-Pack)  Glitter Hair Ties - Single Hair Tie - Pick your Color

           Anthropolgie                                    Nordstrom                                                    Etsy

These hair ties are the modern day scrunchie. Just take a look next time you walk down the street. I bet you’ll notice these little numbers in countless pony tails or being sported on wrists as a sort of functional, yet totally cute bracelet.

Anyways, the price tag on these hair ties, in my opinion, is outrageous. They are double sided elastic that has been tied in a knot. That’s it. And places like Anthropologie are selling them for way too much!

P1030317

So, here’s how we made our hair ties.  You don’t need to be crafty AT ALL to make these. Truly. If you can use scissors and tie a knot, then you can make these hair ties.

Materials Needed:

  • Double sided elastic. You can buy here.
  • Sharp scissors
  • A lighter
  • Cardstock or cardboard

Step One: Cut the elastic into 8-9 inch pieces.

Step Two: Use the lighter to seal the ends of the elastic to prevent fraying.

Step Three: Tie a knot. Fold elastic in half. Loop around one finger and tie a knot.

Step Four: Cut a piece of cardstock and place 3 or 4 hair ties around it.

Step Five: Marvel at your craftiness. And have fun giving them away!

P1030319

And there you have it. Shortbread and hair ties. Are you in?

Cheers,

Melissa


Sunday, December 23, 2012

Lego Party

The boys have just started becoming interested in Legos, which has been so much fun. Legos are magical—put them in front of a kid and they are immediately transformed into and inventor, an architect, and a builder.

And now that these magical little toys have become a staple in our home, it only seemed fitting to have a Lego party.  We found a local store that offers Lego parties—a room set up with bins of Legos for the kids to build and create with.

IMGP5021IMGP5016

I was a little unsure if the Legos would keep a group of five year old boys interested for long, so I had a couple of emergency games in my back pocket just in case. But, remember, Legos are magical. The boys were completely engrossed in playing the entire party. They especially loved creating the mini figures.

IMGP5019

IMGP5022

We did stop playing Legos, briefly, to have some snacks and cake. I made sandwiches shaped like Legos by cutting the bread into rectangles and then using a round cookie cutter to cut out the circles for the top. I secured them to the tops using a little butter.

IMGP5032

I also found a recipe for a Lego cake from Betty Crocker, which I used to create Jack’s cake. It is a pretty simple recipe using a boxed cake mix and marshmallows cut in half. The tricky part of the recipe was frosting the pieces. I got a little frustrated with that part, and in the end surrendered to the fact that it wouldn’t be like the picture. The boys didn’t care that the frosting job wasn’t perfect, after all, they were eating cake with marshmallows on it!

IMGP5013

The birthday boy blew out candles that spelled out his name, which he thought was pretty cool.

IMGP5027

And the Lego party was a success!

Thursday, December 13, 2012

Another Easy Holiday Gift: Scone Mix

IMGP4982

Last month I posted about the Confetti Bean Soup in a Jar that I made with a few of my girlfriends. We got together again this month, and for this round we made scone mix.

We packaged the mix in brown paper coffee bags. The bags are lined, so the mix will stay fresh. A friend found them online. I don’t know the exact company she used, but here are some similar ones.

1/2 lb. Brown Paper Coffee Bag Tin Tie Reclosable 100/PK

source

The recipe for the scones comes from my friend’s mother, Colleen. She has given these as gifts for years, and has perfected the recipe.

Bulk Scone Mix:

20 Cups of flour (note: a 5 pound bag is 18.88 cups of flour, so if you buy a 5 lb. bag, just add one more generous cup of flour and then you don’t have to measure 20 cups)

1 ¼ cup of sugar

½ cup + 2 Tablespoons of Baking Powder  (I buy large containers of baking powder at Costco or Cash & Carry)

5 Teaspoons salt

3 1/3 cups raisins or craisins

3 ¾ c. Crisco – Butter flavored  (one container is just about enough for two batches – ¼ c. short)

Using a food processor, measure out a cup or two of flour and all the sugar. Add all the craisins or raisins. Mix until the craisins/raisins are well chopped.

Put this mixture and all the rest of the ingredients in a very large mixing bowl. Cut the Crisco in using a pastry blender.

Measure the dry ingredients into  bags. Put close to 3 cups in each bag. Use a large skinny can (like what a large can of soup would come in, or  large baked beans, about 26 oz). Cut the top and bottom off, put the can in the bag and fill the can about 7/8 full with the dry ingredients. Using the can provides an easy way to get the dry ingredients into the bag!

IMGP4984IMGP4986

We used alphabet stamps to hand stamp the label. Then we attached the baking instructions to the back of each bag using Washi tape. Have you ever used this stuff?  It’s AWESOME!!! You can find it online, or at craft stores like JoAnn Fabrics or Michaels.

Up to 20 rolls on Wooden Spools of Japanese Washi Tape Choose Your Colors -NEW PATTERNS check photo 2 and 3 for full list

source

clip_image001[7]

And here are the baking instructions. Print them on cardstock and adhere them using the Washi tape.

Embellish however you like. I used bakers twine, evergreen, and small jingle bells. Depending on the time of year you give these, you could have a lot of fun dressing up the packaging to fit your occasion!

IMGP4993

I’m giving these treats to my neighbors this year. They would also make great teacher’s gifts, as well as an easy hostess gift.

Cheers,

Melissa

Thursday, December 6, 2012

The BEST Sugar Cookies

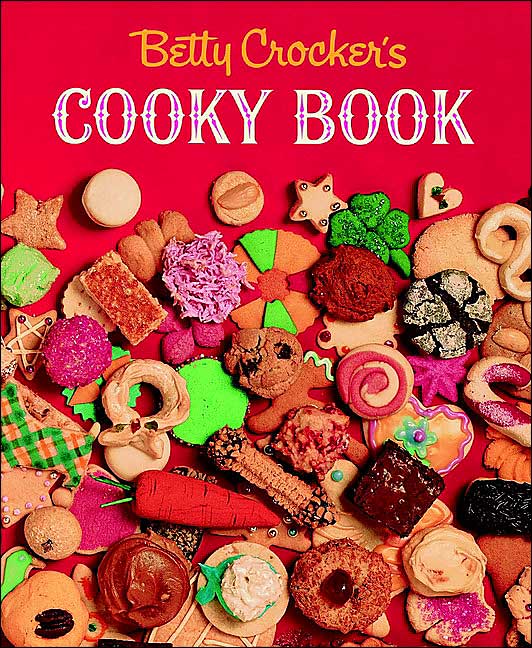
I loved making sugar cookies as a child during the Christmas season. They were (and still are) my mom’s holiday signature treat.  Her recipe comes from good ole’ Betty Crocker. I remember this book as a child and the many cookie recipes that we used from it.

I love the way that cookie is spelled in the title. This book came out in 1963, and the pictures and whimsical sketches in it are a reflection of that time. When I got married, my mom got me my very own copy of the book and I now use it for many of the cookies I love!Betty Crocker's Cooky Book

The sugar cookie recipe that my family has always used is called Ethel’s Sugar Cookies. I have no idea who Ethel is, but her recipe has become a part of our family!

Ethel’s Sugar Cookies

3/4 cup shortening (I use unsalted butter)

1 cup sugar

2 eggs

1 tsp. vanilla

2 1/2 cups flour

1 tsp. baking powder

1 tsp. salt

Mix shortening, sugar, eggs, and flavoring thoroughly. Stir flour, baking powder, and salt together; blend in. Chill at least 1 hr.

Heat oven to 400 degrees. Roll dough out on lightly floured board. Cut with cookie cutters. Place on ungreased baking sheet. Bake 6 to 8 minutes (I usually pull them out around 6 min. because I like them soft) or until cookies are a delicate golden color.

Makes about 4 doz. cookies (if using small cookie cutters)


And once the cookies are made, the decorating can begin!  My family is a fan of buttercream frosting, but you could use your favorite recipe (or just use the stuff that Betty herself sells at the store!). This recipe also hails from the Cooky book.

Butter Icing

2 1/2 tbsp. soft butter

1 1/2 cups powdered sugar

1 1/2 tbsp. cream or milk

3/4 tsp. vanilla

Blend butter and sugar together. Stir in cream/milk and vanilla until smooth. Add more powdered sugar or milk to get desired consistency.

IMGP4945

Then have fun frosting.

IMGP4948  IMGP4949

Decorating.

IMGP4951

IMGP4953

And tasting your delicious creations. My boys sure did!

IMGP4957  IMGP4958

Enjoy!

Melissa


Popular Posts


Blog Template by YummyLolly.com - Header Frame by Pixels and Ice Cream
Sponsored by Free Web Space