Friday, December 28, 2012

A New Cousin

The boys have a new cousin, Sarah. They are so fascinated with everything about her—her little fingers and toes, her little belly, and the fact that she eats, sleeps and poops!

They each got to hold her and I was amazed at how gentle and loving they each were towards her. I melted just watching them.

P1020827

P1020831P1020837

P1020835

P1020842

It will be so much fun to watch these three grow up together. There may be a few years separating them, but I have no doubt these boys will watch out for their little cousin!

Cheers,

Melissa

Geeing

A little confused by the post title?  That’s how Emmett pronounces skiing. He may not be able to quite say the word, but this kid is ready to ski.

P1020781

He had his introduction to the Magic Carpet a few weeks ago when he and Tom went skiing. If you can’t tell from the picture, this little guy was pretty proud of himself on the carpet.

P1020784

He’s still working on his snowplow, but this kid loves being on skis and will, undoubtedly, be racing down the mountain with his brother by the end of the season.

P1020785

P1020790

We  hit the slopes again last week to celebrate Tom’s birthday. This time, the whole family went up and we had a day!  The Magic Carpet wasn’t open, so Emmett rode the chairlift.  Not bad for 3 years old!

P1020849P1020846P1020852

We skied for nearly 5 hours, which is pretty impressive considering we usually last about 2 hours. It was one of those days that gave me a glimpse of the fun that lies ahead of us with these two boys on the slopes.

Cheers,

Melissa

Our Cherub

Jack is in the Cherub Choir at our church. They’ve been practicing hard for several months to prepare for their big performance of Go Tell it On the Mountain in front of the congregation. Jack has been singing the song for weeks and knows the hand gestures by heart. Still, he was a little nervous. It took him a few verses to warm up, but pretty soon he was belting out the lines and performing like a natural. Both sets of grandparents got to watch his performance, as well, which was pretty special since it was on his birthday!

We are so proud of our little cherub!

P1020799P1020804

Cherub cheers,

Melissa

Thursday, December 27, 2012

Santa Pictures

Santa pictures are one of those traditions that, when I became a parent, I wasn’t sure was worth it. After all, it means dragging your kids to some mall, waiting in an obscenely long line to pay for an overpriced picture where your children may or may not be screaming hysterically.  Worth it?  For me, the answer is yes.  I LOVE looking back at the pictures and marveling at how my boys have changed over the course of a year. Sure, we take lots of other pictures throughout the year, but these ones only get displayed at Christmas time, and somehow, the growth seems so much more apparent.

I don’t always go to the same place to take our pictures (as evidenced by a different Santa each year) and my boys aren’t always dressed up in their fancies, but I do make a point to get the picture taken. And each year, I’m so glad that I did.

2012

scan0004

2011

santa picture

(pictured with their cousin)

2010

scan0002

2009

scan0003

Christmas Cheers,

Melissa


Sunday, December 23, 2012

Lego Party

The boys have just started becoming interested in Legos, which has been so much fun. Legos are magical—put them in front of a kid and they are immediately transformed into and inventor, an architect, and a builder.

And now that these magical little toys have become a staple in our home, it only seemed fitting to have a Lego party.  We found a local store that offers Lego parties—a room set up with bins of Legos for the kids to build and create with.

IMGP5021IMGP5016

I was a little unsure if the Legos would keep a group of five year old boys interested for long, so I had a couple of emergency games in my back pocket just in case. But, remember, Legos are magical. The boys were completely engrossed in playing the entire party. They especially loved creating the mini figures.

IMGP5019

IMGP5022

We did stop playing Legos, briefly, to have some snacks and cake. I made sandwiches shaped like Legos by cutting the bread into rectangles and then using a round cookie cutter to cut out the circles for the top. I secured them to the tops using a little butter.

IMGP5032

I also found a recipe for a Lego cake from Betty Crocker, which I used to create Jack’s cake. It is a pretty simple recipe using a boxed cake mix and marshmallows cut in half. The tricky part of the recipe was frosting the pieces. I got a little frustrated with that part, and in the end surrendered to the fact that it wouldn’t be like the picture. The boys didn’t care that the frosting job wasn’t perfect, after all, they were eating cake with marshmallows on it!

IMGP5013

The birthday boy blew out candles that spelled out his name, which he thought was pretty cool.

IMGP5027

And the Lego party was a success!

FIVE!

Doesn’t quite seem possible, but Jack is now five years old. Every birthday is special, but for some reason year five felt like a milestone. Perhaps it is because five signals kindergarten, or maybe it is because five means no longer shopping in the toddler section. Whatever the reason, this birthday was special. And so was the big boy that we celebrated.  L-O-V-E this kid!

IMGP5002

Lunch at the Space Needle with Grandma and Grandpa.

P1020758

P1020759P1020762

Birthday cupcakes and presents at home.

IMGP5035

P1020791P1020792

Lunch at Red Robin with Nana and Boppa.

P1020817P1020822

And a Lego Party with friends!

Thursday, December 13, 2012

Another Easy Holiday Gift: Scone Mix

IMGP4982

Last month I posted about the Confetti Bean Soup in a Jar that I made with a few of my girlfriends. We got together again this month, and for this round we made scone mix.

We packaged the mix in brown paper coffee bags. The bags are lined, so the mix will stay fresh. A friend found them online. I don’t know the exact company she used, but here are some similar ones.

1/2 lb. Brown Paper Coffee Bag Tin Tie Reclosable 100/PK

source

The recipe for the scones comes from my friend’s mother, Colleen. She has given these as gifts for years, and has perfected the recipe.

Bulk Scone Mix:

20 Cups of flour (note: a 5 pound bag is 18.88 cups of flour, so if you buy a 5 lb. bag, just add one more generous cup of flour and then you don’t have to measure 20 cups)

1 ¼ cup of sugar

½ cup + 2 Tablespoons of Baking Powder  (I buy large containers of baking powder at Costco or Cash & Carry)

5 Teaspoons salt

3 1/3 cups raisins or craisins

3 ¾ c. Crisco – Butter flavored  (one container is just about enough for two batches – ¼ c. short)

Using a food processor, measure out a cup or two of flour and all the sugar. Add all the craisins or raisins. Mix until the craisins/raisins are well chopped.

Put this mixture and all the rest of the ingredients in a very large mixing bowl. Cut the Crisco in using a pastry blender.

Measure the dry ingredients into  bags. Put close to 3 cups in each bag. Use a large skinny can (like what a large can of soup would come in, or  large baked beans, about 26 oz). Cut the top and bottom off, put the can in the bag and fill the can about 7/8 full with the dry ingredients. Using the can provides an easy way to get the dry ingredients into the bag!

IMGP4984IMGP4986

We used alphabet stamps to hand stamp the label. Then we attached the baking instructions to the back of each bag using Washi tape. Have you ever used this stuff?  It’s AWESOME!!! You can find it online, or at craft stores like JoAnn Fabrics or Michaels.

Up to 20 rolls on Wooden Spools of Japanese Washi Tape Choose Your Colors -NEW PATTERNS check photo 2 and 3 for full list

source

clip_image001[7]

And here are the baking instructions. Print them on cardstock and adhere them using the Washi tape.

Embellish however you like. I used bakers twine, evergreen, and small jingle bells. Depending on the time of year you give these, you could have a lot of fun dressing up the packaging to fit your occasion!

IMGP4993

I’m giving these treats to my neighbors this year. They would also make great teacher’s gifts, as well as an easy hostess gift.

Cheers,

Melissa

Tuesday, December 11, 2012

5 Minute Snow Globes

IMGP4961

The minute I saw these snow globes at Anthropologie, where they range in price from $18-$40, I knew I had to make them. And I just knew that I could make them for much, much less!

Anthro

Anthropologie

Materials Needed:

  • assorted glass containers—salt shakers, mason jars, jelly jars etc.
  • figurines (I found mine at the dollar store. They are meant for a Christmas village)
  • glue gun
  • Buffalo snow ( you can find at Michaels or JoAnn Fabrics)

Step One: Glue a tree or figurine to the inside of your jar’s lid.

IMGP4963

Step Two: Fill jar with a small amount of Buffalo snow and screw on lid. Now enjoy!

IMGP4973

Done. And in less than 5 minutes. And the best part about this project (besides how ridiculously easy and quick it is) is that you can let your kiddos play with these snow globes to their hearts’ content because they cost you less than a couple of bucks to make! Genius!

IMGP4974

IMGP4967

Cheers,

  Melissa


Thursday, December 6, 2012

The BEST Sugar Cookies

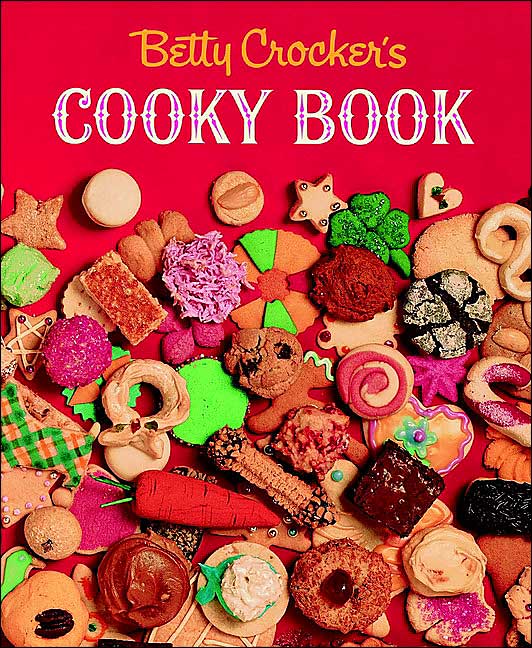
I loved making sugar cookies as a child during the Christmas season. They were (and still are) my mom’s holiday signature treat.  Her recipe comes from good ole’ Betty Crocker. I remember this book as a child and the many cookie recipes that we used from it.

I love the way that cookie is spelled in the title. This book came out in 1963, and the pictures and whimsical sketches in it are a reflection of that time. When I got married, my mom got me my very own copy of the book and I now use it for many of the cookies I love!Betty Crocker's Cooky Book

The sugar cookie recipe that my family has always used is called Ethel’s Sugar Cookies. I have no idea who Ethel is, but her recipe has become a part of our family!

Ethel’s Sugar Cookies

3/4 cup shortening (I use unsalted butter)

1 cup sugar

2 eggs

1 tsp. vanilla

2 1/2 cups flour

1 tsp. baking powder

1 tsp. salt

Mix shortening, sugar, eggs, and flavoring thoroughly. Stir flour, baking powder, and salt together; blend in. Chill at least 1 hr.

Heat oven to 400 degrees. Roll dough out on lightly floured board. Cut with cookie cutters. Place on ungreased baking sheet. Bake 6 to 8 minutes (I usually pull them out around 6 min. because I like them soft) or until cookies are a delicate golden color.

Makes about 4 doz. cookies (if using small cookie cutters)


And once the cookies are made, the decorating can begin!  My family is a fan of buttercream frosting, but you could use your favorite recipe (or just use the stuff that Betty herself sells at the store!). This recipe also hails from the Cooky book.

Butter Icing

2 1/2 tbsp. soft butter

1 1/2 cups powdered sugar

1 1/2 tbsp. cream or milk

3/4 tsp. vanilla

Blend butter and sugar together. Stir in cream/milk and vanilla until smooth. Add more powdered sugar or milk to get desired consistency.

IMGP4945

Then have fun frosting.

IMGP4948  IMGP4949

Decorating.

IMGP4951

IMGP4953

And tasting your delicious creations. My boys sure did!

IMGP4957  IMGP4958

Enjoy!

Melissa


Popular Posts


Blog Template by YummyLolly.com - Header Frame by Pixels and Ice Cream
Sponsored by Free Web Space