Friday, November 30, 2012

Faux Sho’

Remember earlier this week when I told you that I find myself always saying I can make that? Well, it happened again. Anthropologie has this cute little faux fur stole that is absolutely adorable, but the price tag isn’t. 48 bucks!

And so, I once again found myself saying I can make that!  My original idea was to use a real fur stole that was my grandmothers. But, I’m a little weirded out by the fact that it was actually a real live animal (probably because the stole still has the claws on it. YUCK!). So on to plan b. The Internet. It only took one search to find someone else who had recreated this and her version was exactly what I needed to get me started. 

After searching through some really heinous faux fur at Joann Fabric, I found some that was soft and didn’t have an outrageous leopard or zebra print on it. I bought 1/2 yard, but it was way more than I needed. However, I had a coupon for 50% off, so it only cost me a whopping $3.50! And I still have enough fabric left over to make 3 more.

This project was seriously simple. Anthropologie should be ashamed of themselves for charging so much for it! :)

P1020715

supplies needed:

1/2 yard faux fur

sewing machine

scarf

Step One: Cut faux fur into approx. 30in x 10in. piece. Finished size is approximately 28 in. x 4 in.

Step Two: Hem short ends. This will give the ends a finished look. I folded the fur twice and sewed a straight line. The great thing about this fabric is that is very forgiving. The fur covers your stitch, so it doesn’t matter how straight (or crooked in my case) it is.

Step Three: Fold fabric in half (right sides together) and stitch. I pinned it first, but again, you have lots of freedom with your stitch because the fur covers it.

Step Four: Turn right side out. Put a scarf through the opening.

Step Five: Wear it! The Anthro version has some elastic in it, which makes it ruched, but I replicated this look by just pulling my scarf a little as I tied the bow. Best part about my version (besides the price tag) is that the scarf can be changed depending on the occasion.

P1020718

Please excuse the model, she’s an amateur. :)

P1020721

So what do you think? Close enough to the Antro version?  Faux Sho’!

Cheers,

Melissa


Thursday, November 29, 2012

Rippin’

One of the true marks of winter in our family is the beginning of ski season. And since one of the local ski areas opened on Thanksgiving weekend, we welcomed winter on the slopes. Both boys are now on real skis and ready to do some real rippin’ the winter!

P1020681

P1020680

Jack is able to go on chairlift and is pretty good at his pizzas (snowplow) and french fries (skis parallel). Tom and I took turns going up the chair with him.

P1020684

Emmett is magic carpet ready, but there wasn’t enough snow for the carpet to open, so we spent some time on a small rope tow by the lodge. This was his first time on real skis, and I was pretty impressed at how well he did.  But, boy, is this kid stubborn. He wanted ZERO help from us!  Won’t be long before he’s rippin’ down the slopes with his big brother!

P1020685

My boys wearing their brain buckets.

P1020690

And so we welcomed winter with a fun day on the slopes!

P1020691

What do you do to welcome winter?

Cheers,

Melissa
 

Wednesday, November 28, 2012

Sock Snowmen

P1020705

So I suppose I’ve been on a bit of a craft binge lately. I get that way when the weather starts getting colder and I spend more time on Pinterest. I seem to find myself continually saying I can make that! and then the projects begin…

My friend is hosting a holiday craft party this weekend (so excited) and I volunteered to bring a craft. So I’ve been on the lookout for some good projects. After my last failed endeavor with the Sharpie Monogrammed Plate, I wanted a success. Enter the snowmen. I found the idea for these cute little guys on Pinterest and then modified them a bit to my liking.

Materials Needed:

a pair of tube socks

a pair of kids’ mittens

rice or barley

2 rubber bands

scissors

embroidery floss, buttons, needle/thread, ribbon or whatever embellishments you choose

Step One: Find a pair of old tube socks. Yes, they can be used, even have holes in them. See how stained the pair I found are?  Just don’t tell my husband that I stole a pair of his socks for this! Cut the tube part of the sock off and discard the foot part of the sock (pictured below).

P1020703

Step Two: Turn the tube inside out and close one end with a rubber band. I didn’t take a picture of this step, but picture making a mini ponytail out of one end of your tube. Doesn’t matter which end.

Step Three: Turn tube right side out and fill with rice. I made one with rice and one with barley; use whatever you have on hand. Push the rice down so that the sock stretches a bit. Fill until you have the desired plumpness for your snowman. Then use another rubber band to close the tube.

P1020698

Step Four: Cut your mittens. In the original plan I found, the person used ankle socks. I didn’t have any cute socks around, so I used some old mittens that my boys used to wear. Cut one mitten right above the thumb. Cut the other closer to the top, so that you have one mitten “body” that is bigger than the other.

P1020699

Step Five: Dress your snowman. This part was the best for me. It took me back to my childhood and dressing up my Barbies and Cabbage Patch Kids. Start with the larger  hand and then overlap with the smaller one.

P1020700

When I put the small mitten on, I bunched it up a bit and then created a roll neck sweater for my snowman by rolling the top of the first mitten down.

P1020701

Use the larger tip of the mitten as a hat.

P1020702

Step Six: Embellish. Everything I used for my snowmen came from around my house. I used embroidery floss to create the eyes. I just threaded it through the sock with a plastic needle and tied a knot. I kind of got lucky with the carrot nose. I was digging around in one of my craft tubs and found them. No idea where I got them. I often collect craft bits and pieces from family members. Maybe my mom gave them to me? If you don’t have something like this, you could use the tip of a crayon or a bit of plastic. I sewed my embellishments on, but you could easily hot glue them too.

P1020705

P1020707

And there you have it, snowmen! Aren’t they cute?

Tuesday, November 27, 2012

FAILED: Monogrammed Plate Update

P1020695

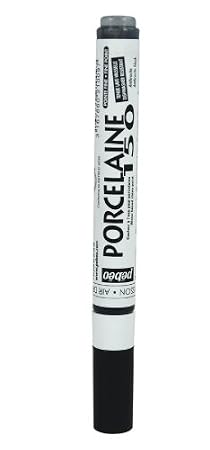
I have now used my Sharpie Monogrammed Plate several times and I am sad to report that the Sharpie is beginning to rub off. :( I was afraid that this might be the case. I have yet to give up on this project, though, because it has such great potential!  I am going to pick up a Porcelaine Pen and see if this delivers more lasting results. I’ll keep you posted!

Tuesday, November 20, 2012

Monogrammed Plate

P1020665

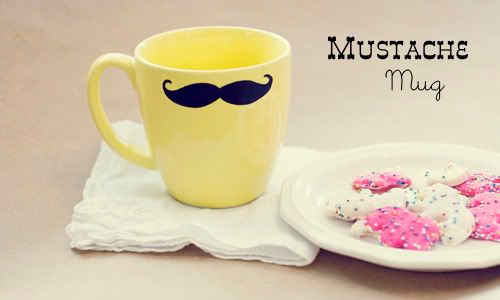
DIY monogrammed plates and mugs have been all over Pinterest lately and I decided to give this project a try. The biggest dilemma I faced was which method to use: Sharpie or Porcelain Pen to decorate my plate. I did some research on the old computer and couldn’t arrive at the best answer, so I decided to give the Sharpie method (since I already had Sharpies at home) a try.

I wouldn’t necessarily call this a tutorial, but I’ll walk you through the steps I took to create my plate. And maybe you’ll just want to give it a try! :)

Step One: Purchase a mug, plate, or dish to decorate. If you already have something at home, use it! I found my plate at Dollar Tree for, you guessed it, one dollar. Love that place!

source

Step Two: Find a design or font to use. I monogrammed mine, but you could draw a picture, use a stencil, or write something freehand on your plate. I used the font Sketchblock, which looks like this:

Sketchblock

You can download this font, and others,  for free at www.dafont.com/sketch-block.font. Then print out your chosen letter, word, or design.

Step Three: Transfer your letter to your plate using transfer paper. I didn’t take a picture of this step, but cut out your letter with a border around it so you can trace it.  Use either transfer paper, or use a pencil to scribble graphite on a paper that will transfer (a make your own transfer paper). Tape the letter to your plate and trace over it to transfer the design to your plate.

Step Four: Use your Sharpie to trace over the outline.

P1020664

Step Five: Let your creation dry. I waited about a half hour.

Step Six: Place your plate in the oven to set the design. Now here is where things got a little tricky. Most directions I found suggested 350 degrees for 30 minutes. My plate did not say that it was oven-proof, and since I wasn’t sure if my plate was going to explode in the oven, I experimented a little. The first time I played it safe and tried 250 degrees for a half hour. That wasn’t enough. When I washed it, the Sharpie began to scrape off a bit. I hauled out my Sharpie again, fixed it up, and put it the oven for about an hour. This time however, I heated the oven up to about 450 degrees, turned it off, and placed my plate in there.  This seemed to work. So far the design has stayed in tact. Regardless of whether you choose to use a Sharpie or a porcelain pen, I would recommend hand washing your dish.

P1020666

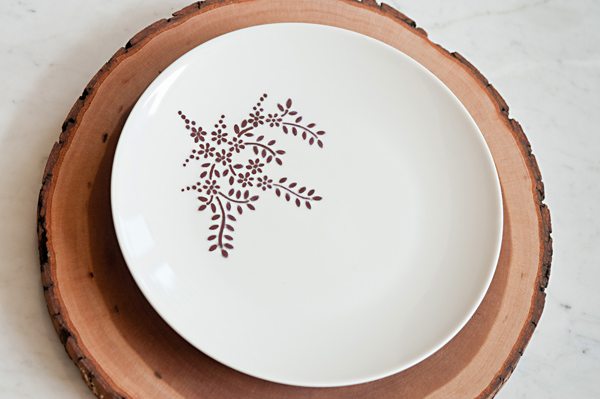
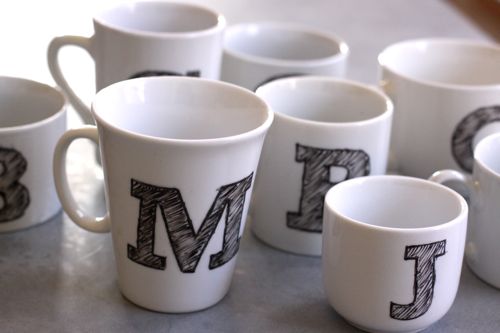
So there you have it, a monogrammed plate.  Imagine the possibilities with this. Here are a few that I like:

source

source

DIY Sharpie plate from The Sweetest Occasion

source

Sharpie dishes tutorial by A Beautiful Mess

source

Happy creating!

Friday, November 16, 2012

Confetti Bean Soup

Just had to share an easy gift that some girlfriends and I put together tonight. Soup in a jar. These will make great hostess gifts for the upcoming holiday season. Don’t you love how colorful the beans are?  I’ve included the supplies needed, as well as the recipe below. Seriously simple!P1020651
P1020653P1020650P1020652

Confetti Soup Ingredients

12 wide-mouth pint (2-cup) canning jars with lid and rings
14 pounds assorted dried peas, beans and lentils(at least 8 different varieties): pink beans, black beans, baby lima, beanslentils, red lentils, black-eyed peas, red kidney beans, pinto beans, split peas, great northern beans, small red beans, white beans
12 chicken -flavor bouillon cubes
12 bay leaves

Instructions

1. Wash, rinse and dry canning jars.
2. Layer beans in jars. Add 1/4-cup of each type of bean to the jars, layering the beans. Choose the most colorful bean for the bottom layers of the jar. Add eight 1/4-cup layers to each jar.
3. Place 1 bay leaf and one bouillon cube on top of the beans in each jar.
4. Cut appropriate amount of coordinating cotton fabric. Seal each jar using lids and rings.
5. Attach cooking instructions by wrapping with rope or ribbon around jar.
Confetti Bean Soup Recipe
Set aside bouillon cube and bay leaf and choose method to soak
beans.
Quick soak: Rinse and sort beans in a large pot. Add 6-8 cups of hot water. Bring to a rapid boil, and boil for 2 minutes. Remove from heat. Cover and let stand for 1 hour. Drain soak water and rinse beans.
Overnight soak: Rinse and sort beans in a large pot. Add 6-8 cups cold water. Let stand overnight, or at least 6 to 8 hours. Drain soak water and rinse beans.
To cook: Place beans in a large pot. Add:
6 cups water
1 can (14 oz.) chopped tomatoes in juice
bay leaf
bouillon cube
add meat, if desired
Simmer gently until beans are tender, about 2 hours. Season to taste with salt and pepper.
Adapted from here.

Thursday, November 8, 2012

Gettin' My Craft On

I love doing crafts. And when both the boys were napping, it was so easy to find the time to do them. But now that neither one naps, my crafting time has been few and far between.

My sister-in-law is due with a little girl in early December. Her baby shower was just the motivation I needed to get some projects going again.  Here is a look at my shower gift to her.

Hair Accessory Organizer (because a little girl’s gotta have a place to hang her bows, ribbons, headbands, and barrettes!)

Inspiration taken from here.

IMGP4827

IMGP4828

Taggie Blankie

IMGP4831

Lovie/Carseat Toy (found here)

IMGP4835

Binkie Holder (adapted from here)

IMGP4842

 I had so much fun making these projects that I’m inspired to continue to find the time to do more. Lookout friends and family, you may just find a homemade gift or two in your stocking this year!

Rocky Mountain High

Altitude, that is. Now that marijuana has been legalized in our state (boo) and Colorado, I felt the need to clarify my title. :)

A few weeks ago, Tom and I had our first airplane getaway since having kids. Tom had a conference to attend in Colorado Springs, and I got to go with him! Although it was a work-related event, we still managed time to get away and spend some time together.

I had never been to Colorado before and was amazed by the beauty of the mountains. The air is so crisp and the sun so brilliant, I can see why people love to ski there. Must be amazing!

This was the view from our room. A beautiful view of the mountains. Actually that particular mountain is home to NORAD (North American Aerospace Defense Command).

P1020552

Garden of the Gods:

P1020554

P1020555

Our drive up to Pike’s Peak. Nicknamed “America’s Mountain” because the song America the Beautiful was written after the songwriter visited this mountain. The summit is at 14, 110 feet. And you can drive to the top!  Quite a drive, and quite something to be up that high!

P1020568

P1020571


P1020579

P1020582

P1020585

P1020588

It was great to have some time away in such a beautiful place. Definitely going to have to do another getaway soon!

Tuesday, November 6, 2012

Halloween

By the time that trick-or-treating rolled around in the evening, the boys were totally ready to hit the streets and wanted nothing to do with taking pictures. So, these are my limited pictures of the night.

Both boys loved getting candy, but they actually liked handing it out at our house better than getting it. And they got a pretty incredible offer from their dad, who offered to buy their candy from them for $0.10 a piece. The boys didn’t have to think twice about taking him up on this offer and they walked away from the deal with $14 to share!  They were happy because they had some money to buy something special. Tom and I were happy because we didn’t have to deal with copious amounts of candy. Win. Win.

IMGP4881

P1020612

Elementary, My Dear Watson

Jack decided that he wanted to be a detective for Halloween. My book club was in the process of reading The Adventures of Sherlock Holmes, so I decided to make him Sherlock.  We easily found a hat for him at a local costume store, but I couldn’t find any coats or capes that were his size and appropriate detective gear.

msd104948_sip_hal_09_dec_ht.jpg

I did a little searching on the internet and found a pattern for an Inverness cape, like the one that Sherlock wore.  I scored 2 yards of houndstooth fabric at Goodwill for $1.50 and already had some bias tape from a previous project. I’d never sewn with bias tape before, and it was surprisingly easy. We found a magnifying glass at the dollar store, and my mom sent us some self-stick mustaches. The suit coat used to be Tom’s when he was little.

We put it all together and Sherlock Holmes stepped out of the pages of the novel and became very real for one excited preschooler!

IMGP4878

Popular Posts


Blog Template by YummyLolly.com - Header Frame by Pixels and Ice Cream
Sponsored by Free Web Space